NHS Intro to Digital Photography
  • Home
  • Curriculum
    • Lessons & Slides >
      • Intro to Digital Photography Lesson
      • ImageTransfer & Workflow >
        • Bridge
        • Importing & Proofing
      • Copyright
      • Buying a Digital Camera
      • Smartphones vs. Cameras
      • Mirrorless vs. DSLR
      • Point and Shoots vs. SLR Cameras
      • File Formats & Aspect Ratio
      • Looking vs. Seeing
      • Getting to know Your Digital Camera
      • Exposure Basics
      • Exposure Compensatrion >
        • Spot Exposure Corrections
        • Global Exposure Corrections
      • Output - Resizing
      • Focusing
      • Shooting Modes
      • White Balance >
        • Adjusting White Balance
        • Adjusting White Balance - 4 Ways
      • Cropping
    • Merging Assignment >
      • Some Background
      • Resolution & Finding Images
      • Before You Shoot
      • Importing Photos
      • Making a Practice Selection
      • Making a Selection become a Cutout
      • Making a Cutout of You
      • Adjusting Color Temperature
      • Merging the Images
      • Resizing an Image
    • Color for Emphasis >
      • Importing & Downloading from Drive
      • Photoshopping the Project
    • Logo Design >
      • Practice Vector
      • Ill Dog
      • Making Thumbnails
      • Getting the Rough to the Computer
      • Setting up to Vector
      • Layering and Planning a Vector
      • Quick Vector Image Touchups
      • Rasters vs. Vectors
    • Beauty Touchups >
      • Clone Stamp
      • Dark Circles
      • Smart Blur
      • Smart Cast
      • Liquify
      • Sharpening
      • Making a Vignette
      • Red Eye
      • Changing Eye Color
    • Antiqued Photo >
      • Antiqued Photo Part 1
      • Antiqued Photo Part 2
      • Making a Wallpaper In Illustrator
      • Antiqued Photo Part 3
      • Antiqued Photo Part 4
    • Film Strip Collage >
      • Cropping
      • Film Strip Collage Construction
    • Folded Card
    • Lens Blur for Depth of Field
    • Straightening a Crooked Photo
    • Blur Overlay Layer
    • Calendar >
      • Calendar Collage
      • Cropping to Fit the Calendar
      • Giving Your Calendar Depth
      • Lens Flare Background
      • Finishing Touches (Front & Back)
      • Proofing, Exporting & Turning In
      • Proofing the Calendar as a PNG
      • Turning in the Calendar
      • Printing the Calendar
    • Weekend's Photo Assignments >
      • Portraits
      • Perspective
      • Leading Lines
      • Textures
      • Foreground & Background
      • Repetition
      • White Balance as a Filter
    • Prepping the Image for the Contest
  • Links
  • Contact

Printing the Calendar

Picture
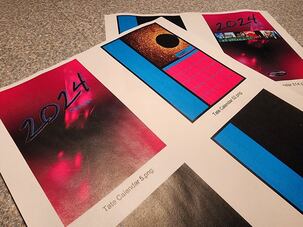
If you have decided to print the calendar, see Mr Tate for an obligation slip to take to the office. Once that's paid, you'll receive the correct paper to print on and can get started. It's best to print each page individually from Photoshop for the best possible quality. This does take more time but the color will be much more vivid.The video below explains the process.

Powered by Create your own unique website with customizable templates.