NHS Intro to Digital Photography
  • Home
  • Curriculum
    • Lessons & Powerpoints >
      • Intro to Digital Photography Lesson
      • ImageTransfer & Workflow >
        • Bridge
        • Importing & Proofing
      • Copyright
      • Buying a Digital Camera
      • Smartphones vs. Cameras
      • Mirrorless vs. DSLR
      • Point and Shoots vs. SLR Cameras
      • File Formats & Aspect Ratio
      • Looking vs. Seeing
      • Getting to know Your Digital Camera
      • Exposure Basics
      • Exposure Compensatrion >
        • Spot Exposure Corrections
        • Global Exposure Corrections
      • Output - Resizing
      • Focusing
      • Shooting Modes
      • White Balance >
        • Adjusting White Balance
        • Adjusting White Balance - 4 Ways
      • Cropping
    • Merging Assignment >
      • Some Background
      • Resolution & Finding Images
      • Before You Shoot
      • Using the Camera
      • Importing & Opening Photos
      • Moving Photos From Your Phone
      • Making a Selection
      • Making a Selection become a Cutout
      • Adjusting Color Temperature
      • Merging the Images
      • Resizing an Image
    • Color for Emphasis >
      • Importing & Downloading from Drive
      • Photoshopping the Project
    • Logo Design >
      • Practice Vector
      • Ill Dog
      • Making Thumbnails
      • Digitizing the Rough
      • Setting up to Vector
      • Layering and Planning a Vector
      • Vectoring Problems and Corrections
      • Quick Vector Image Touchups
      • Rasters vs. Vectors
    • Beauty Touchups >
      • Clone Stamp
      • Dark Circles
      • Smart Blur
      • Smart Cast
      • Liquify
      • Sharpening
      • Making a Vignette
      • Red Eye
      • Changing Eye Color
    • Antiqued Photo >
      • Antiqued Photo Part 1
      • Antiqued Photo Part 2
      • Making a Wallpaper In Illustrator
      • Antiqued Photo Part 3
      • Antiqued Photo Part 4
    • Film Strip Collage >
      • Cropping
      • Film Strip Collage Construction
    • Folded Card
    • Lens Blur for Depth of Field
    • Straightening a Crooked Photo
    • Blur Overlay Layer
    • Calendar >
      • Calendar Collage
      • Cropping to Fit the Calendar
      • Giving Your Calendar Depth
      • Lens Flare Background
      • Proofing, Exporting & Turning In
      • Proofing the Calendar as a PNG
      • Printing the Calendar
    • Weekend's Photo Assignments >
      • Portraits
      • Perspective
      • Leading Lines
      • Textures
      • Foreground & Background
      • Repetition
      • White Balance as a Filter
    • Prepping the Image for the Contest
  • Links
  • Contact

Lens Blur for Depth of Field

Throughout the class I have showed you how to do a lot of things in camera, but most of these have a Photoshop equivalent too. Its best to compose everything in camera, but occasionally you'll find that you want to do something different than what you were going for when you captured the picture. If this is the case, I want to show you how to make it work.

This lesson will show you how to take a photo with a large depth of field and narrow it down using a lens blur. It doesn't take long to do, but it may require a lot of experimenting. Try it out and if it doesn't look good, undo it and try again. This handout will describe the process.

The below example is a before and after example. Both are from the same shot, but after following the process listed above, one has less depth in focus.
Picture
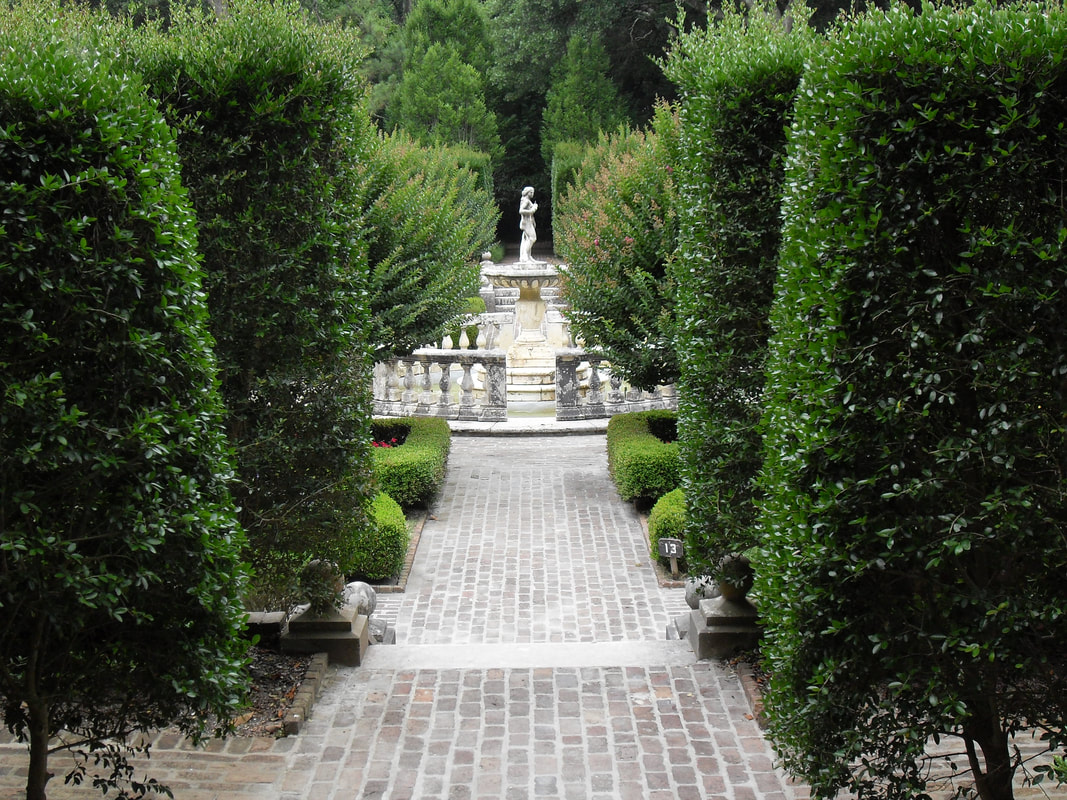
The original "before" picture
Picture
The new "after" picture
Powered by Create your own unique website with customizable templates.